***Paint Classes***

***Paint Classes***
CLASSES HELD AT YOUR DESIRED VENUE
Showing posts with label altered box. Show all posts

Friday, June 19, 2015

Altered Box using Unity Stamp sentiment

Friday is Friends With Flair with Unity Stamps.
I LOVE Unity Stamps.  They can be used in so many ways!
The quality is superb.  

This altered box is for a special little girl turning 8 next week.  Her Mom wanted something special to give her.  I was so glad to be a part of making it more special.
 Wild orchid Flowers are always my go to item.  The Black Pearl flourishes are beautiful.
 The designer paper has fun bright colors for an 8 year old girl.  I cut her first inital out with my silhouette.  Boxes are fun to collect and alter.  I encourage you to try it!

 I'm linking up with:

Simon Wednesday Challenge: Using your favorite technique/product:  love altering boxes and love Wild Orchid Flowers and Unity Stamps.

Unity Stamps: Friends with Flair

Monday, September 22, 2014

Making your own Mixed Media Designer Paper

 
Are you here from Party Time Tuesdays?  Welcome!!
 
If not-Welcome!! LOL
You need to hop on over there for our challenges.
 
I love making my own designer paper using mixed media.
 
Started with a 8.5x11 piece of cardstock. Start spraying Lindy's Stamp Gang spays on top of a white doily.  Pick up and move the doily around the page. Allow to dry thoroughly.
 WARNING!!  You will get ink on you-that's part of the fun!! LOL
 Use a large background stamp to stamp versa mark all over the page and emboss in black.  (or you could stamp in black archival ink)  I wanted some texture.
 I measured, cut and covered a match box with my paper.  Used the whole sheet-no waste!  Distress your edges as you go with Walnut Distress ink.
 Decorated with vintage lace, wired ribbon, Wild Orchid flowers and pearls, and a scripture from Inspired Stamps.
Inside I added a blessing poem from my friend Patti.
 I glue glass beads on the bottom for "feet".  It also adds tons of cuteness!!!!


Thanks for stopping by!  If you have ANY questions-please message me.  I love your comments. Have a blessed day!


Monday, September 8, 2014

Guest @ Craft Hoarders Anonymous

I am excited to be a guest designer for Craft Hoarders Anonymous this month!!
 
Gloria Stengel started this blog with challenges for you to use the craft supplies you hoard.
Great idea right?!
When I started thinking about my supplies-I realized, much to my dismay, I hoard a lot of stuff!
Why?  You know the companies are constantly making cuter and nicer stuff all the time!
 
This challenge is:
 
Challenge #15 All the Pretty Flowers
This challenge is for all of you flower hoarders! Maybe you hoard pre-made flowers. Maybe you hoard flower punches or dies. Maybe you hoard flower stamps. "Dig" out those flowers and use them on your project!
 I've created a prayer box.  I altered a matchbox.  I made my own designer paper using stencils, inks and black stazon.  My hoarded flowers are Wild Orchid Flowers.  The string flat back pearls are from WOF.  The vintage lace I buy locally from a friend. 
 Inside my cute box is a poem written by Patti at A Soul's Heartbeat.  It's about listing your everyday blessings.  You know-the little things: a smile, a hug, a rainbow....you get the idea.  That way when you're having a bad day-you can look in your box and be reminded of God's blessings!

Head on over to the challenge blog:  Craft Hoarders Anonymous and create something to share with us using your hoarded flowers!!  You will get lots of inspiration from the designers over there.  You might even win a prize!!

Thursday, September 4, 2014

Semifinalist Heartfelt Creations

I am thrilled and honored to be chosen as a semi-finalist for the Heartfelt Creations Design team.
There are lots of fabulous people that were also chosen.
 
If you like my designs-please vote for me!
 
If you vote for 5 designers you are entered to win a $50 gift certificate from Heartfelt Creations!!
 
Here's two of the items I submitted:


Here's the link to vote:

https://www.surveymonkey.com/s/5G7NJ5Q


Thanks so much!!

Friday, August 22, 2014

Button Challenge @ Craft Hoarders Anonymous

A challenge made for me!! BUTTONS!  Check it out at Craft Hoarders Anonymous.
Buttons are another thing I hoard!! There is a tiny sewing/craft shop in Rocky Mount, VA that I would spend hours going thru her buttons.  A nickel each.  I would sometimes spend $10 on buttons!! Shush!  Don't tell my husband!! LOL
 
My project today features a large pack of buttons purchased at Walmart.  They have fun and bright colors. 
I love altering boxes.  The paper is from my stash-I won several sheets in a challenge.  Fits perfectly with my button theme.  To decorate some of the edges-I used some border punches.
 After you gesso the edges of your box-inside & out-then you add your paper.  The lid was too tight, so I cut the one side of the lid and attached to the bottom of the box with E6000 glue. It forms a hinge. Works great!
 I've decorated the sides of my box with multi colored buttons layered.  I usually put "feet" on the bottom of my box-in this case they are brown buttons!!

I've enjoyed this challenge very much.  The box will be going with me to a craft show tomorrow in Danville, Virginia.  Finished it just in time!

Click here to go enter the challenge #14 yourself at Craft Hoarder's Anonymous.


Sunday, December 1, 2013

Baby Bassinet finished!

All the glue has dried!
The Baby Bassinet is complete!
 
 After I glued all my 3x3 pieces in place, I white washed it with a mixture of burnt umber and cream and water.  I dabbed and wiped until I liked it.
 Once dry, I took a credit card and swiped gesso over all the surfaces.  Wanted an antique/vintage finish.
 Once dry, I took Vintage photo distress ink pad & rubbed the entire pad over top.  Isn't it luscious looking??!!  I LOVE IT!
 On the inside -after the above steps- I also spritzed some white Dylusions ink and some pink shimmer mist.
 I glued lace in two layers all around the entire box.
 Using Wild Orchid flowers, I missed with the pink shimmer and fixed a long embellishment for the top edges.
 Pink tulle gathered up in five sections, wrapped with some string pearls, pink ribbon & the flower wrapped.


I think she's going to love it. I sure do!

Saturday, November 30, 2013

Paper Artsy Technique Part 1

what do you think I'm making?
You'll never guess!!
If you follow me-you know I have a thing for altered boxes.
One of my customers has a 9 yr old daughter.
She's getting a real looking baby for Christmas.
She asked me to make her a box to wrap it in.
I thought-umm..
How about a bassinet?
That's right-a Bassinet!!
When I saw this technique this week on Paper Artsy-I knew I wanted to do it for the bassinet.
 First I has to find a 24 inch long box!!  Scooped it up at Lowes.  They had bows standing in them.  I just combined them into another box and took this one up to the cash register!  Bold huh?

They gladly gave it to me.  Yes-I'm thinking about going back & hoarding a couple for later projects! LOL-trying to resist!

I coated the whole box in gesso first. When dry, I painted all the edges with burnt umber Masters Touch acrylic paint.


then I cut 3x3 squares-lots of them!  I did 8 sheet of designer paper.  The paper I used was DCWV Old World stack. I used lots of Liquitex Matte Gel medium!

Check out Jo Myhill's technique HERE
Come back tomorrow for the finale!

Sunday, November 24, 2013

Paper Artsy style-Vintage & Shabby Chic altered box

Joining Paper Artsy this week. Liz had a fabulous technique. HERE
I missed the deadline to join-I forget Australia is ahead of us!  It was still worth it.
There are too many steps to list them all, but I'm trying to show you some of the most interesting parts.  I LOVE altering boxes. 
I decided to alter the paper before putting it on my box.  Luckily all sides were the same. I will warn you-You don't want paper all the way to the top.  The lid becomes too tight.  Have learned that the hard way!
 Modeling paste over a rose stencil I have.  Allow to dry.  Using gelatos, I scrubbed-literally-scrubbed/rubbed them all over.  I used a damp paint brush to smear it in. (fingers are very useful as well)
 Then I rubbed red gelato over the rose area.  Use a damp paper towel or baby wipe & wipe it off. Kind of crazy huh?  But I want a vintage/shabby chic look.
 To get different shades/tones- I kind of dabbed the paint
 I lightly spritzed brown smooth over small parts.
 After I added it to the box, I used gesso, vintage photo & barn red distress paint around the edges.  It covers up those edges.

 Here's a couple of pics of the finished box.  The top was layered with a doily, lace, ribbon, a framed vintage girl & a handmade flower.

Here's the top of the bx.  My hand made flower has bits of lace tucked under some of the layers.  Saw Jule with Wild Orchid crafts doing that. 

Hope you love it-cause I ADORE IT.


Friday, November 22, 2013

Sea Salt * Ink * Drying Time

I love altering boxes! 
The sides were as fun to create as the box lid design!

 I cut the flowers with SU die, spray with water & scrunch up tight to dry. After they are dry, distress the edges with Vintage photo ink and layer them with Scotch Quick Dry glue. I added distress stickles in Dusty Rose to the edges and flat back pearls from Wild Orchid Roses.

The sentiment is from Stampin Up.  The designer paper from Fact or Fiction.

The technique on the bottom of the box was SO COOL!  First, I gesso'd the box-dry.  Then I dabbed barn red distress paint-dried pretty quick, then stamped using purple and green pigment ink (colorbok) -I used my Paper Artsy Stamp & they curve easily so I could go around my edges.  I put a heavy coat of sea salt overtop and allowed to dry.  Take your hand and wipe away the dried salt. 
Left a wonderful texture!  there is even a slight glitter left over from the salt.


Monday, November 4, 2013

Cereal box magically becomes card holder!

I entered into a challenge over at My Scrap Room
We had to alter a cereal box into a card/envelope holder for Christmas.
We had to use Christmas theme, poinsettia, ribbon, felt, and  a stamped image.


 For my poinsettia I used Mark's Finest Papers stamp set.  Has a beautiful poinsettia.  I fussy cut several layers and then put them together with Scrap Dots.  Give them some height.  I used Distress stickles and Liquid Pearls to jazz them up.
 I stamped a sentiment from the same stamp set, outlined stamped it withTim Holtz Snowman Blueprint tag & die cut it.  My felt is the little leaves on the poinsettias around the sentiment.
Add string pearls from Wild Orchid Flowers. (that's also where the small poinsettias came from)
 Here's a close up of the fussy cut poinsettia's
 

I LOVE how it turned out.  I'll definitely put this to use immediately!
Hope you'll go check out Gina's site.  They have tutorials, swaps, photo gallery like all ning sites.

Entered this into challenge at Craft My Life

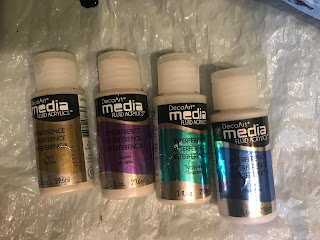
Fluid Art with DecoArt Interference Paint

I've been experimenting with fluid art.   Trying to get cells to create is hard! I've tried multiple mediums, multiple products.  Th...