***Paint Classes***

***Paint Classes***
CLASSES HELD AT YOUR DESIRED VENUE
Showing posts with label cardstock. Show all posts

Friday, August 31, 2012

Multi Media Mini Album Cover

 I use school glue stick to glue my 5x6 chipboard to my paper.  This paper came from a kit I bought on my cruise.  I still like to add a lot of my own spin.
 I roll my brayer over top to make sure the glue is evenly distributed & make sure it's sticking.; Then cut each corner off because you are going to wrap the chipboard just like a present.
 I had used my digital image on regular white cardstock.  I printed two & masked the surfboards. I stamped my waves & colored them with my aqua painter.  Then I combined water to some acrylic blue paint & sponged the sky masking them with hand cut clouds.  I wanted a different blue than my marker.
 I stamped my boards & sand using black stazon.  I colored them using multi layers of colored pencils: light orange, dark orange, yellow, white, blue.  I usually finish them off scrubbing them with the white one -it really helps combine the colors. Then I go back with the darkest color & redefine the outline.
To give them more Pizzaz I embossed the surfboards with clear embossing powder, the star fish with gold embossing powder.  
 I attached my surfboards with small zots.  My Sentiment is a clear sticker that I attached to a piece of blue cardstock & popped up with dimensionals.
Here's my finished project!  It's the front cover of my new mini album I'm working on!  

Products Used
Close to My Heart stamps Under the Sea
Stampin Up stamps In the Sky
Stampin up markers, embossing powders 


I want to especially thank Tiffany Doodles who provided me with the digital image.    Check her store out @ http://www.tiffanydoodles.com/

Thanks for stopping by!! May you have a blessed day!


Tuesday, August 28, 2012

Easy Mini Album Tutorial

Outside of book: Start with 5 1/2 x 11 piece of cardstock. Score @ 5 & 6 inches.  Use corner rounder on each corner.
Deocrate your cover: cut 4 3/4 x 5 1/8. Attach your decorated cover permatac glue glider.

Build your binder/Accordian style.
 Cut 5 1/8 x 7 inches. Score at every inch (1-2-3-4-5-6)
Create a valley fold. Fold & crease with bone folder.

Build your pages.  cut cardstock 4 5/8 x 5 1/8. Score at 1 inch on long side.
 You'll corner round your pages. Use red sticky tape to attach your pages to your folds. May need to rerun your bone folder over the creases.  Line the accordian page & using your crop-a-dile cut a hold in each end & attach a brad.


Now we build our post it note holder.  Cut a piece of cardstock @ 5x4. You'll score both short sides & one long side @ 1/2 inch & 1 inch.  You'll cut away 3 of the little boxes.  Add a tap opening at the top with a one inch punch.   Use red sticky tape to fold the box together & attach to the inside cover of your book.
When I saw The Teresa Collins Notations -mini album popped into my mind! I also added some stamped images.   I ended up punching the binder end so I could run some ribbon thru. On my finished one I tied the ribbon in a bow. Liked it a lot better.  I really love how it turned out. Holds pictures & notes.

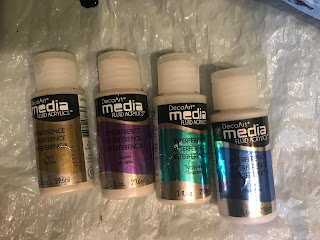
Fluid Art with DecoArt Interference Paint

I've been experimenting with fluid art.   Trying to get cells to create is hard! I've tried multiple mediums, multiple products.  Th...