***Paint Classes***

***Paint Classes***
CLASSES HELD AT YOUR DESIRED VENUE
Showing posts with label Faber-Castell. Show all posts

Sunday, January 10, 2016

Snow? What snow?


Happy New Year!
Faber-Castell's first challenge in 2016 is mother nature's SNOW!  We haven't had any snow this winter yet, but I've been painting snow this winter for the first time and love it! I did this design in my art journal first and my son liked it so I decided to paint him a canvas 16x20.


I love Faber Castel gelato's. They have a creamy consistency. Who's kidding here? I love to use my fingers to create and gelato's are perfect for that! ha!

They are so easy to use.  I had already gotten my canvas ready by using Rebecca Baer's stencil in the corners with her stencil gel and a layer of white gesso. It had dried overnight before I started coloring my gelato's on. I used 3 different blues.
 I spritzed some water and went to work with my fingers!  the fun part!!  I tried to keep the center the lightest color.  Forgot to take more pictures-got carried away creating!!
 I lightly sketched my church with a water color pencil. I used white, black and gray gelatos to do my church and tree.  Once done, I used a second stencil from Rebecca Baer (snowflakes) and white gesso them in various areas of the canvas.  Love how it turned out!!  The gelato's give the church a softness.

Thanks for stopping by! I hope you have a healthy, happy and prosperous 2016!


Thursday, September 17, 2015

#lovefallart Mixed Media Textured Leaves Canvas Video


Today begins 3 days of YouTube video's created by a group of artist that are combining their love of art -in all forms to one common hashtag with a common theme.
#lovefallart

Type the hashtag into a YouTube browser and you'll find LOTS of inspiration!! 

Here's my video:


I'm entering this weeks Simon Says Die Crazy Wednesday Challenge.  I think all the leaf die cuts will qualify!

Thanks for stopping by! Have a BLESSED DAY!


Friday, January 17, 2014

Love is in the Air-Emboss It!


Valentine's Day is right around the corner.  I made this tag to go onto a gift bag.
 
I wanted to use a large stamp I had.  Choose a designer paper that is neutral.  I stamped all over a 12x12 page with versa mark and then heat embossed the image with red embossing powder.
 
Then I cut a size to fit a card, a couple of tag sizes.  You can choose what you want to use it for-even a layout-it's your choice.
 
 
 The sentiment I simply typed up on my computer and printed and matted on black card stock.
 I hand drew a heart out of some old cardboard I took out of a frame.  Using my gelatos, I scribbled the color on it, used my finger to smudge until it was well blended.  I did ink the edges with walnut distress stain.

Are you making something special for your loved ones??  If you need supplies-check out Robyn's store Outlaw Women Scrapbook Emporium.  All inventory is 20-25% less than retail!!

They have lots of the new CHA items in the shop you can preorder them.  Check it out today!!

Entering Really Reasonable RRR87 challenge


Products used:
Stampin Up lace doily
SU Cherry Cobbler embossing powder
Versa Mark
Seam Binding
MME brad
Faber Castell gelatos
SU key

Saturday, December 28, 2013

Design Memory Craft Design Team call

I'm applying for the Design Memory Craft Guest Designer.
The last couple of years my style of crafting has changed so much!
There are so many products available and I love trying new ones and learning new techniques.
 
Faber Castel Gelatos have become one of my favorites!  There are many ways to use them.
Creating mixed media has endless possibilities. I've used canvas for this project.
I started by applying gesso to a 9x12 flat canvas.
I mixed some Tim Holtz stain to modeling paste and applied to my canvas using a brick stencil.
It needs to thoroughly dry before continuing.
 I used the 3 colors of gelatos and roughly colored in the "unstenciled" areas.  (I realize that's not a real word-but blank area sounds so plain!)
 Using an old paint brush and a little water, I started moving the colors around.  It looks like a hot mess below-but wait for it!!
 I sprayed water on it.  This step is entirely up to each individual-how much water you want to use, how much drippage you'll achieve. (spell check is again telling me-drippage is not a word! I think it aptly describes what I'm doing!!) 
 I started drying the runs with my heat gun. I also love the look of dabbing off with a paper towel. Don't be heavy handed or you'll remove too much of your color.
 To bring accents to my bricks, I did a couple of things.  Rub the gelato on your craft mat and use a paint brush to bring in color around the edges.  I also used the Faber Castel White Pitt Pen to add highlights to the corners.  Lightly dab with the paint brush to smooth and combine the colors.  Your canvas needs to be dry, so keep using your heat tool.
Using a clock stencil, I stippled Picket Fence distress paint in several areas.  I had a tiny amount of this brown smooch spritz and I held it back and sprayed a couple of times.
 I'm embellishing the canvas with MME designer paper and chipboard accents, die cuts from Memory Box, a lace doily from Wild Orchid flowers and printed my Baby Info on my computer.
 I punched holes at the top corners of the canvas and attached some blue and white cord I had in my stash.  Made it a little long-my daughter in law can adjust it when she hangs it in the baby's room.
 Below is an extra photo showing off my new grandson!! Isn't he precious?  Brianna hugs and kisses him.  I'm sure that will change as they get older!
 I love how it turned out and will make a beautiful gift for her!  Showcases my two favorite grand children!! (my only grand children-ha!)

Keep your fingers crossed-hopefully my style and creativeness will catch their eye and I'll be asked to join their team!  Thanks for stopping by and I hope you'll be inspired to make your own mixed media project.
If you have any questions, please let me know-I'll be glad to help you.



Friday, November 8, 2013

Snowman for Christmas

I adore doing these canvas pictures.  The Christmas theme is quickly becoming a favorite for me.
I create my background using gesso, Traditions acrylic paints, sprays.  Some brushed on, some stenciled on and some sprayed.
I roughly free hand drawed the snowman and the tree and cut them out of good quality designer paper.  The cheap stuff doesn't hold up as well.  Using liquitex matte medium I glue them down.
 
Then the fun starts again!
I paint and smear using brush and fingers.
To get the edges and the shading I used GELATOS.  LOVE those!!


I love my finished piece.  I'll be entering it in the November challenge at Faber Castell.  One of my favorite companies!!

Saturday, August 10, 2013

Fun technique using distress paint and scripture!

***FUN with distress paint and scripture***

I was so inspired by the way Antoinette at Inspired Stamps memorizes scripture.

I was also inspired by the new challenge at Faber-Castell with Mou.  
"Using favorite words to live by"

I already love doing encouraging cards and art. 
I recently got some of  Tim Holtz distress paints.
You can create a wide variety of looks with them.
I started with some mixed media paper.  If you haven't used any-you need to try it.
It absorbs the inks and other mediums you use without breaking down.
Sorry this pic ended up upside down! LOL
Hope it doesn't make you dizzy!!

Colors used Vintage photo, Barn Red, Mustard seed


Shake them well-they are paint and have to be mixed good before using them.  Then dab them on your craft sheet. I dab-dab-dab and then rub-rub-rub in a circular motion.  when you get the paint where you want it-spritz it with water.  The water activates the paint.


This is a picture of the leftovers on the Kraft mat.  Below is the first swipe I did using a white piece of regular card stock.  The great thing about this technique is the paint goes a long way.  i don't waste any of it!  I have several pieces of paper ready and swipe them until it's all absorbed and gone from the mat.
 After the paper dried-I spritz it good with some Vanilla Shimmer smooch spritz.  Allow that to dry well.  Since I do several pieces of papers at a time-I usually dry overnight so I can't tell you exactly how long it takes.  If your like me, we have other projects going-so lay them aside and work on something else.
Once dry, I cut it to the size I need.  In this case, I'm making a standard card, so I cut it 4x5.25.  That way I can back it on brown card stock to attach to my white card base. I then stamped this cracked stamp over the whole page using Brown Archival Ink. 

I save all my scraps-so I grabbed an ivory piece to stamp my scripture on.  As you can see from my stamp-I use this one a lot! It's one of my favorites.

This stamp set also includes some stitching stamps, so I used the small X's to go around the scripture, then cut the edge with my decorative scissors.

I can't do a piece without using Tim Holtz distress ink! It adds so much character to any project.  After going around the edges smudging it in, I also rubbed it on just the edges to get them a little darker.

I cut some hearts and some raffetta.  Tied the raffetta across the top of the background page before attaching it to the brown card stock with score tape. Using dimensional pop dots I added the sentiment & hearts to finish the card. 

Here's my finished card!  It's totally AWESOME!  Love this technique.
This would also look really good framed.  It could easily be made to fit a 5x7 frame.
Below is a close up showing the dimension.


 Thanks so much for the inspiration Inspired Stamps and Faber-Castell!  I hope you'll be inspired to give it a try yourself. 

Complete list of products used:
Tim Holtz distress paint  mustard seed, vintage photo, barn red
Tim Holtz distress ink vintage photo
Vanilla Shimmer Smooch Spritz
1/4" Scor-Tape
Kraft Mat
Raffetta
Stampin Up Hearts punch
Staz-on Jet Black
Archival Ink Coffee
Inspired Stamps
Mark's Finest Paper and Stamps-You Crack Me Up
Stampin' dimensionals

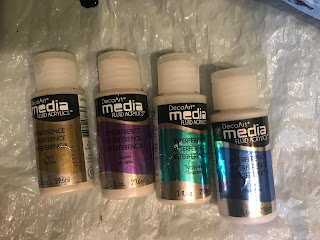
Fluid Art with DecoArt Interference Paint

I've been experimenting with fluid art.   Trying to get cells to create is hard! I've tried multiple mediums, multiple products.  Th...