
***FUN with distress paint and scripture***
I was so inspired by the way Antoinette at Inspired Stamps memorizes scripture.
Here's her link: Inspired Stamps-Memorize Scripture
I was also inspired by the new challenge at Faber-Castell with Mou.
"Using favorite words to live by"
Here's the link: August Challenge at Faber-Castell
I already love doing encouraging cards and art.
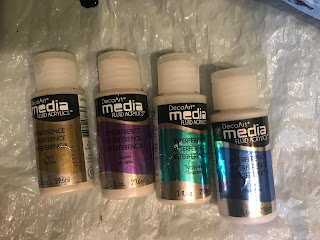
I recently got some of Tim Holtz distress paints.
You can create a wide variety of looks with them.
I started with some mixed media paper. If you haven't used any-you need to try it.
It absorbs the inks and other mediums you use without breaking down.
Sorry this pic ended up upside down! LOL
Hope it doesn't make you dizzy!!
 | ||
| Colors used Vintage photo, Barn Red, Mustard seed |
 |
| Shake them well-they are paint and have to be mixed good before using them. Then dab them on your craft sheet. I dab-dab-dab and then rub-rub-rub in a circular motion. when you get the paint where you want it-spritz it with water. The water activates the paint. |
 |
| This is a picture of the leftovers on the Kraft mat. Below is the first swipe I did using a white piece of regular card stock. The great thing about this technique is the paint goes a long way. i don't waste any of it! I have several pieces of paper ready and swipe them until it's all absorbed and gone from the mat. |

 | |
| Once dry, I cut it to the size I need. In this case, I'm making a standard card, so I cut it 4x5.25. That way I can back it on brown card stock to attach to my white card base. I then stamped this cracked stamp over the whole page using Brown Archival Ink. |
 |
| I save all my scraps-so I grabbed an ivory piece to stamp my scripture on. As you can see from my stamp-I use this one a lot! It's one of my favorites. |
 |
| This stamp set also includes some stitching stamps, so I used the small X's to go around the scripture, then cut the edge with my decorative scissors. |
 |
| I can't do a piece without using Tim Holtz distress ink! It adds so much character to any project. After going around the edges smudging it in, I also rubbed it on just the edges to get them a little darker. |
 |
| I cut some hearts and some raffetta. Tied the raffetta across the top of the background page before attaching it to the brown card stock with score tape. Using dimensional pop dots I added the sentiment & hearts to finish the card. |

Here's my finished card! It's totally AWESOME! Love this technique.
This would also look really good framed. It could easily be made to fit a 5x7 frame.
Below is a close up showing the dimension.

Thanks so much for the inspiration Inspired Stamps and Faber-Castell! I hope you'll be inspired to give it a try yourself.
Complete list of products used:
Tim Holtz distress paint mustard seed, vintage photo, barn red
Tim Holtz distress ink vintage photo
Vanilla Shimmer Smooch Spritz
1/4" Scor-Tape
Kraft Mat
Raffetta
Stampin Up Hearts punch
Staz-on Jet Black
Archival Ink Coffee
Inspired Stamps
Mark's Finest Paper and Stamps-You Crack Me Up
Stampin' dimensionals


2 comments:
Oh my gosh Karen this is beautiful. I am inspired to use my decorative scissors. Beautiful card.
An'Jenic-
Love your card Karen, and thanks for sharing how you made it. Linda E.
Post a Comment