***Paint Classes***

***Paint Classes***
CLASSES HELD AT YOUR DESIRED VENUE

Friday, November 29, 2013

Celebrate the Season card

I wanted to play some challenges this week. Two of my favorites are
Unity Challenge and Mojo Monday.
 Friends With Flair at Unity Blog- use a unity stamp
 
Mojo Monday 321 -uses a sketch


I did 2 slight variations.  I like the second one the best-more distressing! plus I added some lace.
I used Tim Holtz Distress markers for the pretty Christmas ornaments.
The paper is Teresa Collins Christmas Cottage.

LOVE IT! Don't you?
Hope you had a great Black Friday.  I spent most of it with a good friend & my God Child-Carter. Had loads of fun.

Christmas Mini Album

 Kaisercraft Christmas Tradition designer paper


See my you tube video on making this:  https://www.youtube.com/watch?v=GNb8K03MM3s

Sunday, November 24, 2013

Paper Artsy style-Vintage & Shabby Chic altered box

Joining Paper Artsy this week. Liz had a fabulous technique. HERE
I missed the deadline to join-I forget Australia is ahead of us!  It was still worth it.
There are too many steps to list them all, but I'm trying to show you some of the most interesting parts.  I LOVE altering boxes. 
I decided to alter the paper before putting it on my box.  Luckily all sides were the same. I will warn you-You don't want paper all the way to the top.  The lid becomes too tight.  Have learned that the hard way!
 Modeling paste over a rose stencil I have.  Allow to dry.  Using gelatos, I scrubbed-literally-scrubbed/rubbed them all over.  I used a damp paint brush to smear it in. (fingers are very useful as well)
 Then I rubbed red gelato over the rose area.  Use a damp paper towel or baby wipe & wipe it off. Kind of crazy huh?  But I want a vintage/shabby chic look.
 To get different shades/tones- I kind of dabbed the paint
 I lightly spritzed brown smooth over small parts.
 After I added it to the box, I used gesso, vintage photo & barn red distress paint around the edges.  It covers up those edges.

 Here's a couple of pics of the finished box.  The top was layered with a doily, lace, ribbon, a framed vintage girl & a handmade flower.

Here's the top of the bx.  My hand made flower has bits of lace tucked under some of the layers.  Saw Jule with Wild Orchid crafts doing that. 

Hope you love it-cause I ADORE IT.


G45 Christmas meets Word Art Wed Scripture

I have been making lots of stuff to sell to others, but nothing for myself!
so today is in honor of ME!
I love the G45 Christmas Paper.
 I took apart a poinsettia spray from dollar tree.  Gesso'd some of it, but wanted one to be bright and stand out.  There's a sheer green bow underneath.  This is a 9x14 canvas.

 Here's the scripture from Word Art Wednesday challenge #107 this week.  I love it!
 There is paper layered with gesso, paint, smooch spritz, blue spray ink. Sponging, stamped some wording.  Then you apply your designs.  To make them POP-you outline them with watered down black paint & smear it.  I love that effect.

My good friend Cassandra has a You tube video on this technique HERE on her blog.

Here is the finished piece in a frame.  I did take some gold rub and buff and smear with my finger to bring in some gold to match the frame.

Hope you like it! I Love it!


Friday, November 22, 2013

Sea Salt * Ink * Drying Time

I love altering boxes! 
The sides were as fun to create as the box lid design!

 I cut the flowers with SU die, spray with water & scrunch up tight to dry. After they are dry, distress the edges with Vintage photo ink and layer them with Scotch Quick Dry glue. I added distress stickles in Dusty Rose to the edges and flat back pearls from Wild Orchid Roses.

The sentiment is from Stampin Up.  The designer paper from Fact or Fiction.

The technique on the bottom of the box was SO COOL!  First, I gesso'd the box-dry.  Then I dabbed barn red distress paint-dried pretty quick, then stamped using purple and green pigment ink (colorbok) -I used my Paper Artsy Stamp & they curve easily so I could go around my edges.  I put a heavy coat of sea salt overtop and allowed to dry.  Take your hand and wipe away the dried salt. 
Left a wonderful texture!  there is even a slight glitter left over from the salt.


Wednesday, November 13, 2013

Blog Candy Alert!!

Head over to my friend Karen's site HERE

She's giving away the cutest paper clips you've ever seen!!


All you have to do is join her blog and comment.  You'll be entered to win.

Have a blessed Wednesday!

Tuesday, November 12, 2013

Isaiah 41:13 Word Art Wednesday

Anytime I need a special card. My first thought is which scripture to use.
My second thought is wonder which scripture Word Art Wednesday is doing this week.
 
This week's scripture worked well with the card I need for this weekend.
 
I jumped on Pinterest to get an idea for a thanksgiving theme.
Here's my result;


I used Stampin Up die with leaves.. A very simple card. I love it though. 
It's the last minute on the challenge-but I'm linking it up.

When you need art scripture-check out Word Art Wednesday

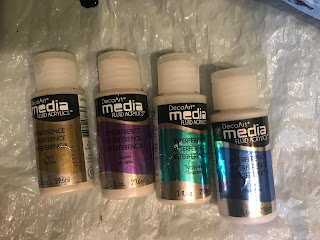
Fluid Art with DecoArt Interference Paint

I've been experimenting with fluid art.   Trying to get cells to create is hard! I've tried multiple mediums, multiple products.  Th...