***Paint Classes***

***Paint Classes***
CLASSES HELD AT YOUR DESIRED VENUE

Friday, February 27, 2015

Friends With Flair Friday

Happy Friday!  
Snow still on the ground-but not falling from the sky! Hooray! 

Need to work on some Mother's Day cards.  Thought I'd combine some Unity Stamps.
Been seeing watercolor techniques everywhere-so that's where I went. I used Stampin Up watercolor pencils and inked the edges with Ranger Denium Distress Ink.

The Unity butterfly stamp had lots of detail. Little hearts worked in there-which is really cute!

I used a DecoArt stencil to make the dandelions-even embossed them in black.

The Mother's Day sentiment is a Unity stamp too -from the Sadie Girl set. Really nice font.
 Below is a closeup of the butterfly. After coloring it-I covered it with glossy accents and sprinkled glitter on there-can't get a good shot of the glitter-but it is pretty.

 Thanks for stopping by & hope you have a blessed weekend!!


Faith~Hope~Love Mixed Media

I totally LOVE how this canvas turned out!

Layers/Layers/Layers
Did some stenciling, Lots of Americana Paint!
 Took two pictures -trying to get the best shot due to the shine.  That's the satin sealer.

Thursday, February 26, 2015

Hello You! Challenges


We had a big snow last night.  I'm spending the day participating in challenges! Fun!

Simon Says: Work It Wednesday:  wants to see spring-me too!  These shades of pink scream spring!
Paper Crafters Corner Week 88: had an inspiration photo. I wanted to mimic the globe shape with the different papers stuck on it. I decoupaged one inch scraps onto a piece of white cardstock. Ran it thru my big shot using the swiss dot folder. Cut it in a circle and matted it on white.
Mojo Monday 386: did a tall & skinny card. I did 6x4.5-I wanted to fit my circle. But I followed the layout they had.
 The "hello you" is my new diecut from Stampin up. I LOVE it!
Have a blessed day & stay warm!


Frozen look alike! Mixed Media canvas

I'm back again today with another mixed media canvas.

I had draw this girl a while back. I loaded her into photoshop and did some "fixing" of her hair to get more blonde.  Printed it out on regular cardstock. Created the background and added her to it.

The background:  applied layers of thin designer paper with DecoArt matte decoupage.
Watered down some Americana paint and went over the pages.
Mixed some purple DecoArt Media spray into some texture paste and ran it around the edges.
While it's wet I drew some squiggles with the end of a paint brush.  Allow to dry completely.
I added some Americana Indian turquoise to DecoArt Sand Texture and applied thru 
a DecoArt stencil in random areas. Allow to dry completely.

Then you add the girl and the words (cut on my Silouette)
Anytime I add cardstock to my canvas I like to go around it with matching paint and a fine brush. It helps to "ground" it into the canvas so it feels like a part of the finished piece.
After that step had dried good, I added some dots with DecoArt Paper Effects in silver.
Final thing to do: seal it with Americana Satin sealer.
 The shine is the satin sealer I used.

Wednesday, February 25, 2015

Mi-xed Media-texture-depth-dimension


I hope you're having a great week.  I wanted to share with you one of my newest projects.
I did the hearts separately from the canvas and added them for dimension using large dots on the back to raise them off the canvas.
I started with some 140lb watercolor paper. I did a coat of DecoArt gesso on top.
Using DecoArt decoupage for fabric I glued down some lace, washi tape and book page. Allow to dry.  Then I took some distress stains and pounced them on top. Use your heat gun to dry some of it, but I also dabbed some off with a paper towel.  Gives you different shades.
 I dripped some water on there and dabbed off to get more dimension.  I used a sponge and added some walnut distress ink to edges.  The little heart I stamped a design on it.  I love how all of them turned out.
 On the 12x12 canvas itself, I added some sealer over a stencil before inking in some spots (the diamond shapes). I added some texture paste thru DecoArt doily stencil in various places.  After applying the same colors of inks to the canvas, I rubbed some DecoArt Metallic wax (gold) on top of the raised areas of the doily.  I layered some lace, washi tape and book pages to the canvas too. Love all the texture!!

Went around the edge of the canvas with black gelato. Rub it in with your finger.
 When complete, I sealed the top with spray varnish-gives a glossy finish.  I love it!!

Tuesday, February 24, 2015

12x12 Canvas/Mixed Media


DecoArt has some GREAT products.
I created this 12x12 canvas using their paints and decoupage (with glitter).

There is a couple of things I love about their Americana paint.
~it comes in so many colors/shades.  They actually have a flesh color and a flesh shade color for me to use on the faces I love to draw and paint.  Make it super easy to color her.
~the matte finish is leaves is perfect to use other types of media's on top.  I used a Prisma black watercolor pencil to outline her and a Faber Castel pen for the detail work on her eyes.

I have some chipboard frames in my stash-thought it would nicely frame my girl.  I painted and stamped on it separately and then added to my canvas with thick glue.
I prepped my canvas by gluing on some hymn pages using Deco Art matte decoupage.

The silver dots you see on her dress are another Deco Art product called Paper Effects.  It comes in several nice colors.  I used silver for this project.
 To make the beautiful dimensional flowers: I started with some flowers I had in my stash left over from a previous project.  I needed the colors to match my project, so using my finger I smudged the paint color (with white on one finger)-dabbing and smudging until I got this two toned mixture.
 Next, I outlined them with a Prisma black watercolor pencil and blended the edges with a Stampin Up blender.
 Added some swirls and lines with Faber Castle black pen. Before adding them to the canvas I gave them a generous coat of Deco Art GLITTER Decoupage
 I sprayed my canvas with a good coat of Satin Acrylic sealer before adding the flowers.

Saturday, February 21, 2015

I won and Used some of my prizes!!


I love winning new goodies!!
I received two packages today and just had to break into them and make something!

I used Sizzix embossing folder on all the cards below.  I patted Lavendar ink on the top side of the folder and layed my white paper on top. Ran it thru my Big Shot. 
 LOVE the effect it gave. Almost a distressed/chalk look.
Then just add some Really Reasonable Ribbon to jazz it up!


 I used the Bow Easy ribbon maker from RRR. See below. Quick & easy.
 Make flowers with Heartfelt Creations die. Inked the edges with the same lavendar ink, dabbed some yellow distress paint in the center, to finish it-added some spots of bisque liquid pearls.

 Won all the above goodies from Dottie Seubert!  Very generous!  I used the Sizzix Embossing Folder on my cards.

The ribbon pack below I won from Really Reasonable Ribbon.  They carry top of the line ribbon/twine and other products. 

I'm entering RRR Challenge #112-Purple and Green with Ribbon/Twine

Monday, February 16, 2015

Video Craft Room Storage & Valentine's


We're still focusing on storage ideas this month at Altered Pages.

Here's a video of my craft room with some ideas for you!


Altered Pages has some of the best vintage collage sheets for Valentine's Day!!

It has been so much fun creating with them this year.  Here are a few of my favorites:


 I hope you've gotten some good ideas about storage this month.  We have more coming up!  Check back every day at Altered Pages Blog to see what our other designers have for you!


Thursday, February 12, 2015

Painting Cardboard with DecoArt Supplies


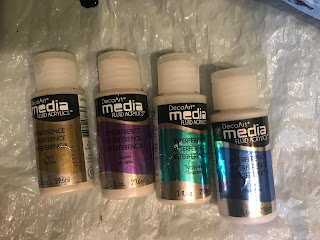
Decoart makes several brands of paint and other supplies.
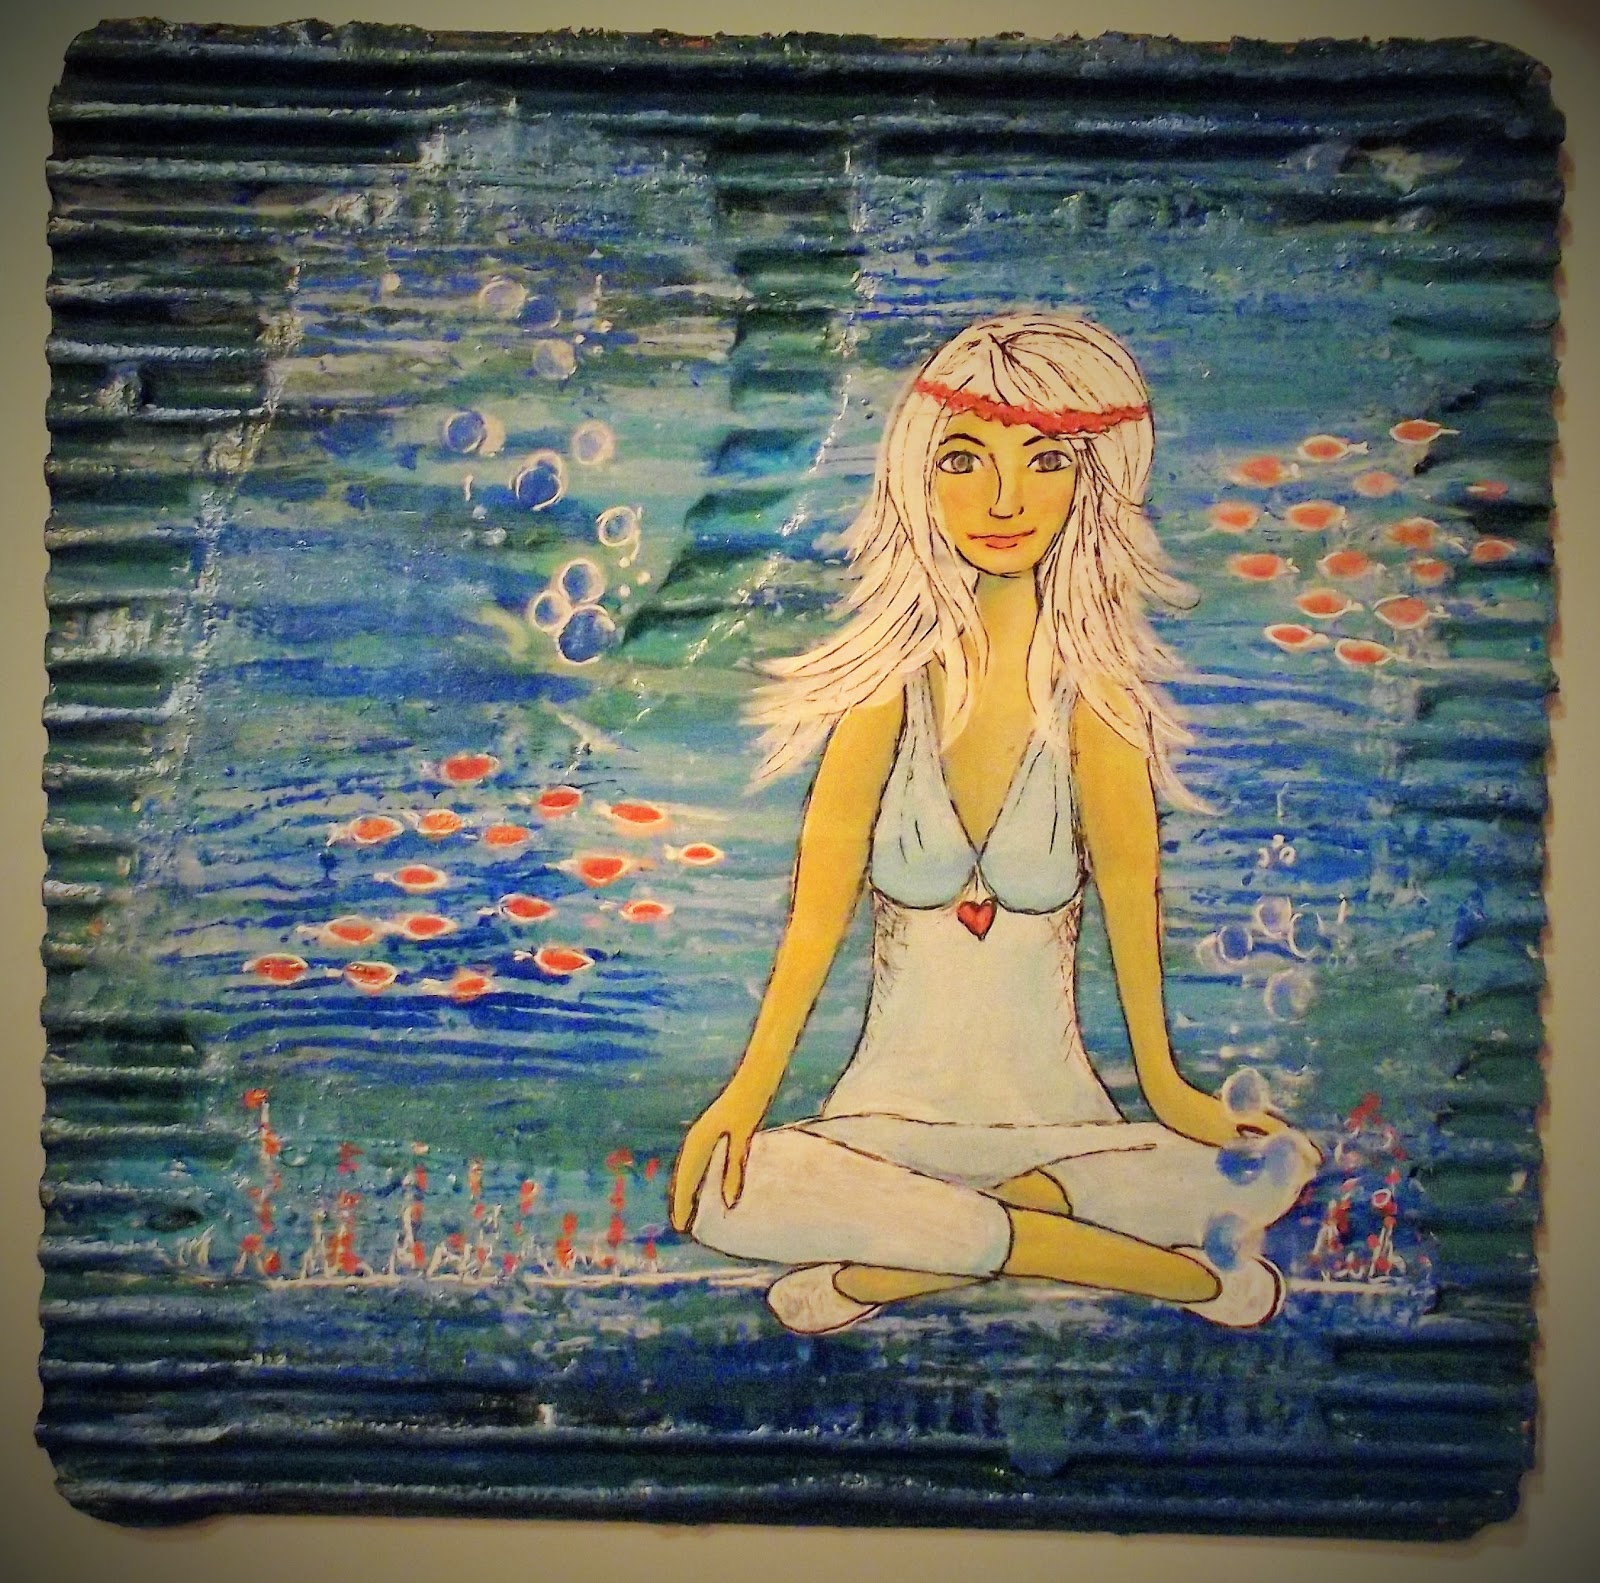
I wanted to share with you my Mixed Media piece I created using the products below.
 Americana Painted comes in over 200 colors.  The DuraClean Satin Varnish not only seals the piece, but creates a beautiful shine.

I started with an 8x8 piece of cardboard.  I put 2 coats of gesso on there before I started with the paints.  Started with small dabs of Indian Turquoise and Antique Teal and a scraper.  I scraped across the panel. Added some Sea Aqua and White Wash using the same scraping technique till I was satisfied.  You do need to use your brush in the middle to totally get into all the cracks. I coated the whole surface with the Satin Varnish.

Using a Stencil by Retta-"wood" design, I painted some lines in Primary Blue and White Wash in random areas to create depth and "ocean" texture.

I practiced drawing my girl in my sketch pad, then was able to use black transfer paper to get the majority of her details onto the dried canvas area. 

Her skin was painted using Yellow Ochre, Sand, and White Wash. Added a little color to her cheeks and lips with Terra Coral.  Her hair and clothes was done in White Wash & I used a small amount of the Indian Turquoise to shade.  The girl was outlined using a black Pitt artist pen.

The fish I laid the tip of my brush down with the Terra Coral, outlined with a white gel pen.  Using the white gel pen, I drew the "floor" with sea grass coming up. I dotted some of the coral color along the sides.  When everything was dry, I applied another coat of the Satin Varnish.

 For finishing touches, I used DecoArt's Metallic Lustre products.  I LOVE these waxes. They are shiny and they every surface I've used them on.  The Turquoise and Blue I rubbed in various areas with my finger tip.  The copper I used some water on a paint brush and dabbed onto the fish. Gave them some extra pizazz!
This piece was done from a class I'm taking with

Guadalupe Brizuela Cabal


She is an amazing lady & I hope you'll check her out!


Thanks for stopping by. If you have any questions or comments-feel free to leave them.
Have a blessed day!

Tuesday, February 10, 2015

Vintage Valentine


Vintage Love....
it's easy to do with Valentine Collage sheets from Altered Pages.


 I started with a tan piece of cardstock and ran it thru my Big Shot with an embossing folder. That's the texture you see. 

After I printed and cut my vintage Valentine, I layered it on a piece of white cardstock and a bigger piece of red cardstock.

To doll it up a bit, I added the heart trim and a red bow. 
It's so adorable! 

My inspiration was from the Papercrafting Challenge Magazine Monday #86.  It featured a big red heart and lots of vintage valentine images.  I had to participate!!


My Heart is Yours!


Love is in the air!
February - Cupids - Sweethearts
Just brings a smile to my face!

The card below was quick-but makes an awesome statement.
Features some cut outs from my Cricut machine, some sheer ribbon from Joann's, a flower from Wild Orchid Flowers, stamped sentiment from Unity Stamps and a new DP.

My confession?
I hoard Wild Orchid Flowers.
I can only bring myself to add one or two here and there.
But as you can see from this card-one is all it takes sometimes!!

 I'm entering the February challenge at 
Craft Hoarders Anonymous.  You'll find tons of Valentine inspiration there!  Gloria Stengel has made a beautiful Valentine Canvas for her project-very lovely!

Thanks for stopping by.  I'll be sharing more Valentine's in the days to come.


Friday, February 6, 2015

John 3:16//Journal


John 3:16
For God so loved the world
that whoever believes in him
will not perish but have
everlasting life!

That promise is the one thing that keeps this crazy world from getting to me.
Knowing I'll only be here a short time, but then I'll spend ETERNITY with
my Lord & Savior!

This is the scripture that we're focusing on this week at His Kingdom Come.

I started in my journal with gesso'd pages.
I painted a base coat with Deco Art Americana Decor Chalky Finish: Smitten.
Then I used a paper stencil I had cut the hearts a while back. I've used it several times. 
I sponged Rouge on next.


 As you can see from the completed picture-I added a name inside each heart representing the "whosoever s".  God loves everyone. His hearts desire is to have everyone accept His son Jesus so they can live forever in eternity with Him.

Putting my trust and faith in God has never let me down! Every situation is not perfect, but knowing God's got my back-all things work out!!

I hope you are a blessed child of God. You'll know what I'm talking about.

Monday, February 2, 2015

Scripture Journaling 2 Cor 3:18


I just finished week 3 of His Kingdom Come bible study.
Our scripture:
 
We have a song each week as well.  This week was:
Dan Moen- Let Your Glory Fall
I immediately envisioned God's Glory falling on me from heaven!
What an awesome feeling!!
So that's what I've created.
 I started by coloring my gesso'd page with gelato's using my water brush by Altered Pages.
Below I added clouds with my Liquitex texture paste and my finger.
 I added my details next. I had this girl I had drawn and I didn't like the background she was on-so I cut her out and glued her on this page. Like her much better!!

 Journaling with scripture is a wonderful way to help me memorize the verses and really meditate on them all week. I love it!  I hope this encourages you to try it.


Fluid Art with DecoArt Interference Paint

I've been experimenting with fluid art.   Trying to get cells to create is hard! I've tried multiple mediums, multiple products.  Th...